Hey, thank you for joining my second tutorial!
I always like to build things with a little extra fun, and I just experienced the magic of new pixels when building my Steampunk raspberry PI project.
One of the things I'm really interested in is using three wires. . .
You can turn on and control a series of RGB lights, which are quite bright, low power and easy to control.
I combined a simple paver path with a new mix, some glass bricks, and a 45-watt solar panel system that I worked on from Port Freet for this project.
It doesn't need solar energy, but to be honest, if you don't use solar energy, it will be more painful, because anyway, you have to run some kind of electricity for it, and you have to convert it into direct current.
First of all, I would like to commend Depot for his lack of guidance: I want to mention very quickly that I have entered the solar and outdoor challenges. . .
If you think this is worthwhile, I would appreciate voting in these two categories.
I don't do that in games, but I like it very much.
But in the end, I hope you can learn from my achievements and my mistakes.
This is the source of the idea of using glass blocks, under which there are light emitting diodes as a way to illuminate the road.
I started with this concept and changed it to an Aduino with new pixels, adding a larger solar panel system and a battery-saving motion sensor.
This became the basis of the project.
Now that you have the initial idea, I'll start describing components and initial plan updates: 10/12/2017-
I uploaded a picture with a rock boundary to make it look more "finished".
In addition, I uploaded a 3-minute video to show this. . .
It's taken during the day, so the lights aren't as eye-catching as at night, but it shows the animation and triggering of motion sensors, the installation of motion sensors, Arduino, charge controllers, batteries and solar panels, and how power and Aduino plug into the USB ports in the shed.
Hopefully for those who want to build something like this, it's a little helpful.
Thank you for your support, advice, questions and favorites. . .
I hope you decide to build this. If I can help you in any way, please feel free to contact me.
For this project, I chose the following options.
Please note that these are my choices, not my requirements. (
I'll list those for electronic devices later. . Of note. .
I am first and foremost an electronics/software geek, and my experience in installing outdoor structures is novice, at best. 1)
The 16x16 paver is laid along the side. 2)
Paver Foundation Sand 3)
Layout pattern of rope, stake, horizontal 4)
16x8 paver, highly similar to the above paver, for intermediate "line" 5)
Sacrete Permasand, or some "sealant," will help lock pavers together 6)
Optional: Paver floor(
I used this because I had never installed a sidewalk before, and my situation was that digging was difficult and unnecessary. (
I'm on some sensitive cables. .
This saved me four inches of excavation to lay the rock.
If you don't get this, you'll need four inches of gravel under your sand. 7)2x4's. . .
You will use these temporarily to help build a framework in the sand and intercept it.
I would say there are two for every eight feet. (assuming 2x4x8)
Plus a gravel.
For electronic equipment: 1)An Arduino. . .
Varieties are not important. . .
A United Nations organization will do well.
I will review electronic computing, but I used two USB cables and finally cut off both ends of the three cables. )14 gauge wire. . .
I used 100'volume to set it up. (
Amazon bought six packages at a reasonable price. 4)22 gauge wire -
I use this as a signal line 5)
PVC pipe length 6)
I used 12 LED Neopixel rings. They were fantastic. . .
With enough brightness at night and so many LED lights, power consumption can be controlled very flexibly.
Link: A glass "block" similar to a shower/private wall.
I searched for glass blocks in my favorite local shopping application(
Provide, give up, Craigslist, etc.
Quite a few people were found, each for a few dollars.
I bought 14 and used 8.
These additional tools are useful for prototyping. 8)
Rustolem Grinded Glass Spray Painting
It's amazing when it's combined with glass blocks. . .
Thanks to my wife's advice, it does give this project a great "look" and hides some challenges that you will face when installing LED.
Example: conformal coating(
Link: This helps to waterproof electronic equipment 10)
HD sprayer
Waterproof again and help avoid corrosion-
Link: Clear Silicone Rubber Sealant and Use it with Sealant Gun-
This is used to protect electronic equipment and as an additional layer of water protection. 12)(
Update 11/27/17: See Step 6 below)
To get a better waterproof solution and wiring connection, replace the heat shrinkable pipe and the hot air gun instead of the water-proof wire nut. (
Letter of Credit: Farkleman)
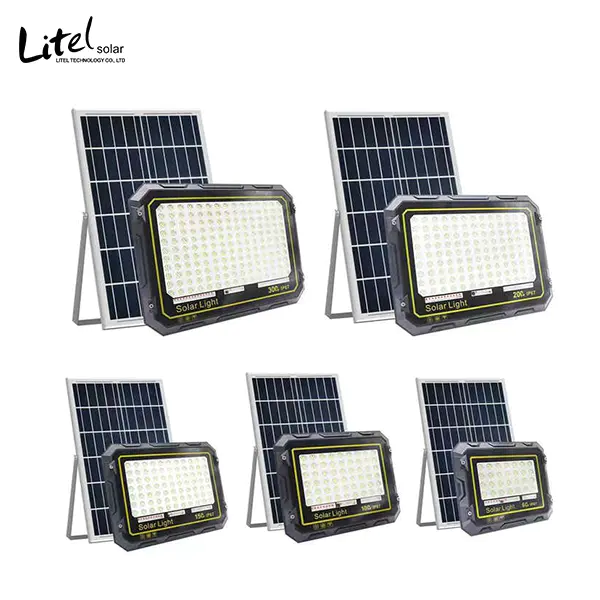
For solar panel systems, you need three parts: 1)Solar panels -
I'm using a 45-watt package from the Port Freight Company. (
They are cleaning them up and replacing them with a 100-watt system, which may be more appropriate)2)
Solar Charging Controller-
My batteries are available, but you can buy them on Amazon for less than $40. 3. Battery -
I use a 35-ampere-hour battery, which can provide me with about five hours of "on" time if I want.
With motion sensors and time-limited panels, it gave me enough time.
The price of the project depends on the length of the walkway, the type and quality of the bricks selected, the machinery and tools available, and
Need, if you have built solar energy(
Or choose another way)etc.
The most expensive part of the project is not electronic devices, light-emitting diodes, etc. , but the rest.
I estimate I spent about 15 pounds. -
When I calculate wires, waterproof materials, LED rings, etc. , it's $20 per lamp.
Again, it's clear that I'm not an expert on Paver routing.
I read other textbooks, YouTube videos, etc.
The idea of how to do this, and then try to use what I have.
That is to say, I noticed that many videos started with "Cleaning up the Land" and then showed a clean, ready place where they could start laying sand.
So I want to give me the steps I have taken, hoping that part of the "land clearance" can be broken down more to help people get out of trouble.
The first part is to "remove" things before we really start building them.
Onions, frozen cakes, ogres and paver devices all have something in common. . . layers.
The next step is to start building layers again in a prototype way.
Here are some useful steps for me: in the next section, it's hard for me to describe it. . .
It should be meaningful to refer to pictures when reading.
As you pass through these sections, keep checking your path and its level.
At this point, you should be able to plan your way, walk on the paver, and most things should feel solid.
Any loosening here should be locked at the end. . .
But then we have electronic devices!
Next is the interesting part.
I compiled this method. This is my first attempt.
I can say that from the point of view of my product, it's really beautiful, but that doesn't mean it can't be improved, so please keep this in mind when reading this article.
After all, this is the difference between what we are building and most other paths. . .
Design Idea/Objectives: Power Calculations. Please step back and talk about the power of this project.
I used eight modules, each with 12 Neopix LEDs.
In order to calculate power consumption, I must complete the following tasks: 1)
Each Neopixel uses 20 mA for each color at full brightness(0-255 levels). . .
It can display three colors at the same time.
This means a maximum of 60 mA per pixel. 2)
Each "block" has 12 pixels below it. . .
Multiply it by 60 mA = 720 mA to get a single block and turn it "white" at its brightest setting. 3)
720ma*8 blocks = 5.
7 amperes can illuminate everything, but there is an attraction on Aduno. Wow. . . 5. 7 amps is ALOT. . .
But this is the worst case.
I know I'm going to use a lighter adapter on my solar controller, and Arduino will get nominal power. (under 20mah)
So I'm not so worried.
Okay, for my setup, I'm using a USB adapter with 22.
Four ampere ports. 8 amps.
That's not close to five.
There are seven in all, so I think I will add some restrictions to better understand the possible situation: if I only use two LEDs of the same color, the current of each LED will be reduced to 40 mA. (
Basically, don't turn them bright white every time. .
This will reduce the total power to 3. 8 amps.
If I want full white, I can limit it to 10 instead of turning on all 12 LEDs. . .
Then, the calculation results are as follows: 60*10=600 * 8 blocks per block = 4. 8 amps (perfect! )
You can learn more in Neopixel UberGuide.
This page from Ada Fruit is a great strategy on how to optimize the number of pixels you use.
I only tested 6 new pixels per block, they are still bright enough, so you really have a lot of flexibility here.
Finally, if for some reason, you do need a lot of pixels. . .
One option is to use a inverter and insert an appropriate power supply.
Adaruit provides 10 amperes and 5 volts of power, which will bring you considerable power.
But remember. . .
Turn off the solar panel/battery system. . . .
Efficiency is important for maximizing battery time. Speaking of. . .
Take five amperes off a 35 ampere battery, and we can say it's seven hours at most. . .
If we use the "don't consume more than 50% of the electricity" rule to protect the battery, it will reduce our power to 3. 5 hours. . .
Therefore, another design consideration of this project is to turn on the LED when motion is detected.
Keep battery or power in mind when designing. (
Maybe when the sun goes down, a three-hour timer can satisfy your wish. motion)
This part of the video shows me connecting and testing my power calculation.
If you're not sure, then this is really the best way / time to solve the problem. . .
Connect things temporarily and test them to make sure the grounding and wiring are in good condition.
Now that we have planned this and understood the power consumption, we can start to concentrate. Well, there's enough planning, enough time to connect things.
Look at the video to start. It will give you a solid idea of what we are going to achieve. :)
Further observation: If you want to know more about waterproofing, the video I watched is an excellent Flite test video that shows these technologies used by UAVs and discusses other waterproofing components, such as servos.
I embedded it in the gallery.
In this section, you need to know three things: 1)
Your power supply has two wires(
Solar panels)
Then move up and down the whole path.
These are basically an electric track. . .
You need a positive line and a ground/negative line. 2)
You will have a third wire from one brick to another. . .
This will form a line for the Neopixels signal line and return to Arduino. (
It must be electrified, so it is likely to return with the rest of the wiring. 3)
Remember the discussion about power. . .
I need two power rails. (2. 4 amps each)
So I used four wires.
Keep this in mind, because it's a critical moment. .
If you use four wires, you may want to put them in the center of the path and separate them.
That's what I did, and it worked very well.
Okay, considering these factors, here's how to combine: keep placing blocks, tie wires, and choose(But suggestions)
Stick things together with tape on a wire tie.
You have to bury this work under the paver, so you have to test, test, test and make sure it lasts.
Well, if you're at this point, you should connect your signal line to Arduino and run a stream test.
The block should light up. . .
If not, please re-check wiring, public grounding(
See steps 9 and 10)
And the connection/wire nut.
Once you have all the building blocks repaired, it's time to clean up and lock them.
Please note that you don't need solar energy now. . .
Battery packs are enough.
Once your lights are on, put down your bricks and flatten everything.
In my case, my central brick is slightly thinner, so I have to add a layer of sand under each brick in the middle row.
This works well because it helps protect electronic devices and ensures that bricks don't fit right on the wires. (
The first picture above shows this.
In addition, if you have any screw nuts, you can't put them under the pavement. . .
You should dig out the small hole in the sidewalk and put it there.
The middle passage of the sidewalk is a good place to lay wires and clean things.
Next step: It should look like Picture 2. . .
Almost ready, except that there should be a gap between the bricks.
These clearances are necessary because we need to pour the glue into the paver.
In the next section, remove the paver kit(polymeric sand)into the slots. . .
Usually, this will pile up a little bit on the side, and you'll want to use a broom to get it into the crack.
You'll want to fill all the cracks because they stick things together.
It's helpful to tap the paver lightly with 2X4, because it can precipitate any existing "stuck" sand.
I used my hand to help it get into the area. . .
Tip: Wear gloves!
It reacts to water, so if you put it in your hand and try to wash it off, it will become more sticky.
I had to scrape it off my skin with a putty knife. (
If you don't listen to gloves, that's a good suggestion. .
Once the sand between all the cracks is filled, it is important to clear the excess sand.
If you don't, the sand will dirty your paving stones.
After that, you can "set up". . .
Just use a garden hose with a gentle spray to get it wet.
I used a bucket because my water pipe was broken and it seemed to work.
The last photograph shows everything filled and wet.
Finally, you need to spray a frosted glass spray on all the glass blocks. . .
This will help to spread them and make them look better than they did at the time of non-proliferation.
It does make a big difference in appearance and makes the block glow with it.
Just light up occasionally.
Next we go to the solar area!
There are many lessons about solar energy. . .
I really don't qualify to compete with them.
I'll give you my short version.
There are three things you need: two things you may need / want help with: some details about my settings(
You should adjust to your needs.
Now you can finish it.
I will add pages for add-ons such as light sensors, motion sensors, etc.
Now, if you have any questions about this, please let me know.
I will try to add videos so that you can see some effects.
In addition, I will update, because I put forward a better "mode" of light, and I will continue.
If you are trying, encountering any obstacles, or need to clarify any of them, please let me know in the comments below.
I hope you like it. . . till next time. . . .
My first appendix is to add motion sensors. . .
This is installed and connected, but I'm still dealing with some errors in the code.
Now, that's what the mountain looks like and what's behind it. . .
Next step: I need to add code.
The logic is basically "when moving, play animation to greet the user, then play rainbow three times, and then close".
Rainbow cycles take about a minute, so this gives them time to go through and then shut down in a few minutes to save the battery.
Last weekend, as we walked down the road, a potentially nightmare scenario occurred. . .
I closed all the pavers, locked in my design, and then. . . Something is broken.
Three lights are on, that's all.
After the initial panic, I decided to study how to troubleshoot the aisle and repair it. Turns out. .
Repair is good!
The first thing I have to do is find out what's wrong. . . .
Here are some tips for that part: repair-Good news. . .
Not so bad!
I haven't walked before, so I don't know how to fix it.
As it turns out, it's not terrible. . .
If you set the right spacing between the pavers, you just need to break the "cement slurry" and lift the bricks out.
To this end, I used a flat-headed screwdriver and a hammer to work slowly around the bricks I was about to remove.
Once I've solved the whole thing, I use a screwdriver as a lever to lift the bricks slowly.
Once you take out the bricks, you can scrape the excess paving material/cement slurry off the bricks and the holes you have removed and clean up the things.
It may be a little picky, but it will disappear.
After that, you can check the wiring. . .
Check the connection. . .
See if the wire in the wire nut is loose, whether there is something broken at the solder joint, etc.
For me, the wire with a screw nut is not twisted, and my wire is not relaxed enough.
Finally I twisted the wires with pliers and welded them together with a new wire nut.
When I finished, I simply tested it to make sure everything was repaired, retested it, and put the bricks back in place.
Next weekend, I will bring more paving compounds out to re-seal it and resume business!
I'm really surprised how easy it is to cut bricks in this way.
Although the road of the paver feels very permanent, if you have a chisel or something to chisel the bricks out, it's not too bad to get into it in your way for maintenance. Whew!