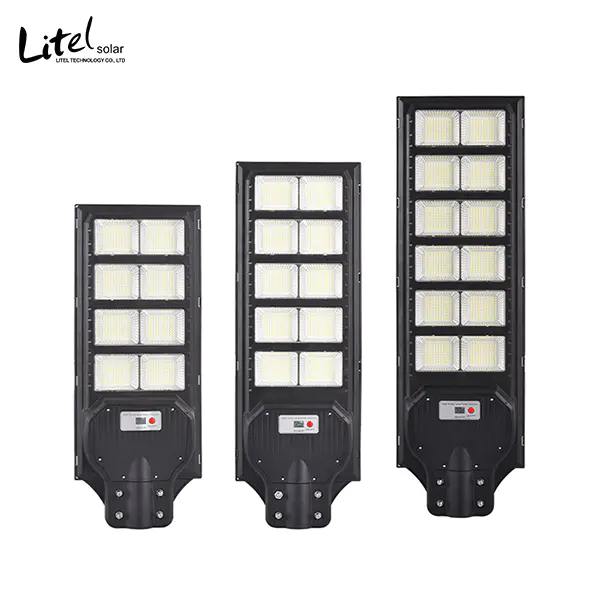
This illustrates the details of a shogunate solar lamp.
Scanning the garage revealed everything I needed to make a solar version.
The teacher took part in the lighting competition. -
Your vote will be a great help.
Lighting Module Re-engineering-
Using solar path lamps, the frame is made of 5 mm. (~1/4")
The Luan plywood and translucent panels I left behind from a cabinet project are remnants of plexiglass that can be traced back to an older cabinet project.
Path lights have an amazing part collection and cost is really low.
If you try to buy all the components individually, you end up spending more money on solar cells, rechargeable batteries, LEDs and charging controller components.
If you buy a 24 x 24 inch board from your favorite timber supplier's shop, make a single cross cut to make a 16 x 24 inch board.
The incision will be used to make the top and bottom end plates.
Then tear the plywood into 16-inch strips.
There are two different widths of 0. 75" and 0. 5".
Four for each width.
The lamp is about 12 inches high.
Cut the sliver to 12"with a diagonal saw. The off-
Cutting will be used to make the track of the lamp, so it will be retained after the cutting strip reaches 12 ".
Carefully cut the same length.
I stacked four pieces together to make sure the ends were aligned and then cut.
So I can make sure that they are the same length, which is very important for square buildings.
Stick the thin strip to the wider strip so that the corner ends around 0.
Each direction is 75 ".
The plywood thickness plus the width of the ribbon is about 0.
75 ", the same width as the wider bandwidth.
When the glue solidifies, I "clip" the parts together with blue painter tape.
Once the glue solidifies(~1/2 hour)
Glue the rails in.
The track connects the corner pieces to form the side of the lamp.
Fix with painter tape and wait 1/2 hours to solidify the glue.
Measure the internal distance to ensure the size of the top and bottom panels.
The actual size will depend on the accuracy of the cutting strip, so it is best to measure the top and bottom panels before cutting them to the appropriate size.
Cut the top and bottom panels to the actual measurement size.
I'm about four years old. 75" square.
Measure the diameter of the solar module and draw a circle in the center of the top panel.
The idea is to have a solar panel printer-
Install into the hole of the top panel.
I used a 1/2-inch wooden chisel to circle slowly until I finally cut to the other side.
Don't cut through the chisel in the first round, or you'll split the wood instead of cutting it.
You can also eventually split the panel.
When you finally penetrate the chisel, use a piece of wood as a support to avoid damaging the chisel.
You know, wrap a thick wooden nail with a file or sandpaper to make the hole smooth and check whether it is suitable for solar cell components.
Work carefully and slowly until you pass the module through the hole tightly.
So far, glue should be put on the side of the frame.
Careful operation, because the glue will not reach the maximum strength for a period of time, and then the bottom plate will be glued to the frame, as shown in the figure.
I also cut some 3/16"strips to glue under the floor to provide additional support.
Finally, I glued these strips to support the upper panel.
When the floor is in place, glue the remaining tracks together, as shown in the last picture.
There's no magic in it. -
It's just tedious and meticulous work.
I glued everything together with a clip and a painter's tape.
Use a right-angle ruler to make sure everything is aligned correctly.
Once the glue solidifies, nothing can be adjusted.
The frame shall be completed after the glue solidifies.
Put down the top panel to check for suitability.
Adjust the match with sandpaper according to the need.
The original plan was to leave the lamp without a base, but it didn't look right.
Channel lamp has a stainless steel support tube of about 3/4 ". (
The lamp I use is exactly 20mm.
In diameter, so this is used to connect the base of the lamp to create a floating appearance.
Careful operation, open holes in the center of the floor.
It is easier to make the hole before bonding with the glue, but this is the last minute design change.
The positioning pin is wrapped in sandpaper to adjust the dimensions until the stainless steel pipe fits closely with the hole.
In order to provide additional support, make a whole in the center of the module notch, and then adjust the hole with sandpaper to get close fit.
Make sure that the lamp tube is at right angle to the lamp, and glue additional support rings to the floor.
The base is made of two pieces of 5 "long 21/2" poplar wood.
You can also use a 1/2 or 3/4 plywood.
I used a Kreg fixture to make two small holes under the base and screw the two parts together.
You can stick these pieces together, clamp them, and wait for the glue to dry.
No matter what method is used, as long as the parts are connected correctly(
If there is any glue, please set aside the setting time of the glue.
Cut a 3/4"hole in the stainless steel pipe base with the shovel head.
Adjust the hole with sandpaper to make it close.
Then the base and lamp can be assembled.
At this time, the base and the lamp are fixed together by a tight press fit.
After determining the final height, epoxy glue will be used to set the final connection height.
The side panel was initially a transparent 1/16"plexiglass sheet.
A random track sander with 320 sandpaper is used to create a grinding appearance on one side.
I used to do this on another project, and there was a piece in the garage.
You can use frosted glass spray paint equally effectively.
The panel is cut into a certain size on the table saw.
Be careful. Wear protective clothing. -
Weared plastic debris will fly to you at supersonic speed-
You don't want to be hit in the eye.
A safer way to cut plexiglass is to draw a line and break it like cutting glass.
Curve saw can also be used.
In order to fix the panel in the frame, I used a welding contact adhesive.
You just need a small bead around the edge of the plexiglass.
The glue solidifies quickly.
This lamp is designed for my daughter's bedroom, so we need a switch.
Magnetic relay is a good solution because it can avoid holing in the lamp.
You can turn on the lights by placing magnets near the relay.
To turn off the light, remove the magnet.
Remove the base of the solar module and drill a 1/8"hole for the wire to enter.
Carefully remove the printed circuit board from the base, and then roughly cut off an LED terminal in the middle.
The relay is welded to two cutting feet so that the current path passes through the relay from the battery to the LED.
After removing the magnet, the relay is disconnected and the LED is turned off again.
Cutting off the LED power supply ensures that the battery charging circuit remains functional.
All that's left to do is-
Install the base, place the top panel in place, and complete the installation.
If you want to use it outdoors, you'd better use polyurethane to prevent wood from dampness.
But I won't leave it in the rain. . . .
After all, it's wood.
You can also paint it, dye it, etc.
If you really want to leave it outside, be sure to stuff the upper panel and around the module to prevent water from entering.
Before assembling translucent panels, they can also be painted/dyed/transparent coated. . . .
But that's thinking about the future. . . . and I didn't! Enjoy your lights!